Thursday, April 20, 2006

SHF #18 -- Bourbon-licious!

I am very excited to participate for the first time in a Sugar High Friday!

I knew nothing about bourbon before I moved to Kentucky. Did you know that all bourbons are whiskeys, but not all whiskeys are bourbons?

Here are some quick facts about the smooth substance, from the folks a the Labrot and Graham Distillery, makers of Woodford Reserve, our house bourbon.:

No whiskey can call itself Bourbon unless it meets the following criteria:

Must be made in the United States

Distilled at less than 160 proof from fermented grain mash

The grain recipe must be at least 51% corn

The product must be stored in new, charred, white oak barrels at no more than 125 proof

Nothing can be added to the final product except pure water

I learned a lot about bourbon in my four years in Kentucky, like a bottle makes a great hostess or thank you gift; non-whiskey drinkers will sip on a glass of good bourbon; even dogs like bourbon (when it is occassionally spilled on the floor!); and don't call Jack Daniel's bourbon in front of a Kentuckian (or me now, for that matter!); mostly I learned about cooking with it. I have made everything from Bourbon Baked Beans to Bourbon Brown Sugar Sauce for ice cream, and probably my favorite...the Bourbon Ball. My husband and I were married at an historic log cabin church in Paris, Bourbon County (yep, our marriage certificate even says Bourbon County!), Kentucky. For the reception we featured Kentucky foods and drinks, like Flag Fork Farm Beer Cheese (YUM!), Kentucky Ale, and of course Bourbon Balls (made with Woodford Reserve)! We made over 300 of those little buggers, by hand, to give out to the family and friends in attendance. I haven't quite gotten over that experience, and have stuck to extremely small batches since then!

A few months ago I made some Bourbon Fudge Brownies from Cooking Light (March 2003) when we had a weekend guest. They were really good, especially when warmed and topped with Purity After Dinner Mint ice cream! This weekend, for our Easter party, I wanted to make them again. As I was preparing them, I realized I used the 2/3 cup instead of the 1/2 cup when measuring the flour, which made the batter more like a dough. To compensate, I added approx. 1/4 to 1/3 cup additional bourbon, extra cocoa powder, and 3/4 cup chocolate chips. The result -- HEAVENLY! Here is the modified recipe, with a modified title that more accurately reflects their bourbony-goodness!

Bourbon Truffle Brownies

1/2 cup bourbon

1/4 cup semisweet chocolate chips + 3/4 cup semisweet choc. chips

1 2/3 cups all-purpose flour

2/3 cup unsweetened cocoa

1 teaspoon baking powder

1/2 teaspoon salt

1 1/3 cups sugar

6 tablespoons butter, softened

1/2 teaspoon vanilla extract

2 large eggs

Cooking spray

Preheat oven to 350°.


Bring bourbon to a boil in a small saucepan; remove from heat. Add 1/4 cup chocolate chips, stirring until smooth. Lightly spoon flour into dry measuring cups, and level with a knife. Combine the flour, cocoa, baking powder, and salt, stirring with a whisk.


Combine sugar and butter in a large bowl; beat with a mixer at medium speed until well combined. Add vanilla and eggs; beat well. Add flour mixture and bourbon mixture to sugar mixture, beating at low speed just until combined. Add 3/ 4 cup chocolate chips.


Spread batter into a 9-inch square baking pan (I used my Emile Henry heart-shaped pan, which is the perfect size!) coated with cooking spray. Bake at 350° for 25 minutes or until a wooden pick inserted in the center comes out clean. Cool in pan on wire rack.

Thursday, April 13, 2006

A Sure Sign of Spring


I love when asparagus can be found for less than $2 a pound! That means warmer weather is here (along with tornados), and it is time to start eating veggies we haven't seen in 8 long months (or so)! The April issue of Vegetarian Times had a recipe for Asparagus-Pesto Lasagna. The recipe sounded good, but their picture was a bit on the pale and pasty side to me. However, a virtual friend of mine made it and raved about it on the Cooking Light Bulletin Board (a favorite haunt). I trust, better, I run to his recommendations, so I knew I had to make this dish on Monday night when my sister, BIL, and nephew were coming over [none of which are veg-heads, but I still love them! :) ]. The recipe is posted over on the link, but I will repost here, in case the link goes down (thanks to Bob for typing and posting it on the CLBB).

Asparagus-Pesto Lasagna
(Vegetarian Times April 2006)
(Serves 10)

1/3 cup all purpose flour
3-1/2 cups low fat milk, divided
6 Tbsps pesto, or more to taste*
2 Tbsps. Grated Parmesan, plus additional for garnish, optional
1 tsp. salt
¼ tsp. black pepper
2 tsp olive oil
1-1/4 lb. asparagus spears, tips cut off and reserved, spears trimmed and chopped into 1/4” pieces
1 clove garlic, minced (about 1 tsp)
16 no-cook lasagna noodles (9 oz)(I used 9 noodles, and couldn't find no-cook!)
2 cups shredded Fontina or part-skim mozzarella (8 oz), divided

1. Preheat oven to 350. Whisk flour and ½ cup milk in saucepan until smooth. Gradually whisk in remaining milk. Bring to a boil over medium heat, whisking constantly, and boil 1 minute until thickened. Remove from heat: stir in pesto, parmesan, salt and pepper. Reserve one cup of the white sauce.

2. Warm oil in a large nonstick skillet over med-high heat. Add chopped asparagus (not tips) and cook, stirring often, 5 minutes or until tender. Add garlic, cook, stirring, 1 minute and season to taste with salt and pepper. Remove from heat.

3. Coat 13 x 9 baking dish, layer three noodles on bottom, overlapping slightly. Layer with half of cooked asparagus, ¾ cup cheese and half of sauce (I used less sauce, since my noodles were already cooked). Add another layer of pasta, remaining sauce, remaining cooked asparagus, and ¾ cup cheese. Top with a layer of noodles, then with reserved cup of white sauce. Arrange reserved asparagus tipes over top and sprinkle with remaining cheese. (I had sauce, ca. 3/4 cup, leftover b/c I had pre-cooked my noodles.)

4. Bake, uncovered. 35 to 45 minutes, or until golden. Let stand 10 minutes; serve with additional grated parmesan, if desired.

Per Serving: 413 cal; 21g protein; 17g total fat (8g saturated); 44g carb; 44mg chol; 686mg sod; 2.5g fiber; 8 g sugars* Look for the freshest, most flavorful pesto in the refrigerator section of the supermaket, packed in vacuum sealed bags or plastic tubs.

Friday, April 07, 2006

The Evolution of Pizza...


at my house anyway! Here is the very delectable end-result...a tomato and asparagus pizza on my all-time favorite crust (recipe from Deborah Madison's Vegetarian Cooking for Everyone). This pizza looks as yummy as it tasted. Of course, it was a labor of love to get it to the final stage.

Let me backup and clarify the story....

First, I bought a new pizza stone in January (via Amazon.com) because our first one had an unfortunate collision with one of our dogs (thankfully, on the stone was hurt, and that story is for some other time!). I used it maybe twice before I noticed it had what appeared to be oil stains...not really sure how that would have happened, but I do know it was putting off an awful smell, kinda' sweet and icky all at the same time!

So, it was banished to the pantry until I decided I couldn't take it any longer, I HAD TO HAVE homemade pizza. Hubby agreed, so I set about making the dough, and while it was rising, I set off to sand the yucky stuff off of the pizza stone (per the recommendations given here), under my hubby's watchful eye (or camera, maybe!). Hence the picture in the garage with the palm sander.


Okay, sanding done, stone washed and dried, dough is ready to go. I rolled out half the dough for the pizza (the other half goes into a well-oiled ziploc, remove all the air, and place in freezer for future use).

It had been a while since I made pizza, so I put the dough on the peel, and proceeded to put tomato sauce on it. Hmm...something seemed not quite right here. OH WAIT! I need to prebake the pizza. DUH! So I scraped off as much of the sauce as possible, and into the oven it went.

I baked it for 7 minutes, then went in for retrieval. Well the darn dough, instead of slipping onto the peel, proceeded to hightail to the back of the stone, and then JUMPED! ARGH! Now I had half cooked pizza dough cleaning for its life, its tail end getting sizzled by the very hot oven element below. I start yelling some very choice words, grab the tongs, and start pulling pieces of it out. The half-cooked dough was flinging around, piling up, and what was resting on the hot element was putting out an awful stench.

Hubby comes running in from the garage to see what the commotion was about to find our dinner looking like this:


Alas, I dry my tears of frustration, blanch the asapragus (they were forgotten about in the hoopla surrounding the stone and the burning shattered dough), and remember that I have the bag of dough sitting in the freezer. Luckily, it was just cold, not frozen.

So, I repeated the procedure, and here it is ready to go in the oven. I love that you can see the little ends of the asapragus sticking out!

Thursday, March 30, 2006

Freakin' Fantastic!


Pear Walnut Muffins

This is one of those recipes where the "sum is greater than the parts." (if that is indeed, the correct saying!)
My sister made the Cooking Light version of these a few weeks ago, and I was really surprised at how good they were. I made the Vegetarian Times version last night, and again, the ingredient list is almost a yawn to look at, but the end result is so yummy! I brought some to the folks on my hall today, and all agreed, they were scrumptious. So, without further ado.....I give you Pear and Walnut Muffins (in mini form).
Pear and Walnut Muffins
Vegetarian Times, March 2006
makes 12
These tender muffins wowed every one of our testers. They have a great nutty taste and are studded with chopped fresh pears. You can also make them with apples.
1 1/2 cups all-purpose flour
1/2 cup whole wheat flour
2/3 cup firmly packed brown sugar
1 Tbsp baking powder
1/2 tsp salt
1/2 tsp ground cinnamon (I used Penzey's Cake Spice)
1 1/4 cups finely chopped ripe but firm pears (about 2 to 3 medium pears) (I just chopped mine, not finely.)
1/3 cup coarsely chopped walnuts, toasted*
3/4 cup reduced fat milk (I used vanilla soymilk)
2 Tbsp vegetable oil (I used olive oil)
1 large egg, lightly beaten
sugar for sprinkling
(I also added approx. 1/4 cup raw wheat germ.)
1. Preheat oven to 400F. Coat 12 standard muffin pan cups with cooking spray (I used two 12-count mini-muffin pans coated with Pam w/ Flour).
2. Combine both flours, sugar, baking powder, salt and cinnamon in medium bowl, and whisk to blend. Add pears and walnuts, and toss gently to coat.
3. Combine milk, oil, and egg in small bowl; stir to blend. Make well in flour mixture, and add milk mixture, stirring just until moist (dough will be sticky) (mine wasn't sticky, but a bit liquidy).
4. Divide batter evenly among prepared cups. Sprinkle tops with sugar. Bake 20 minutes or until muffins spring back when touched lightly in center. (even with the smaller pans, mine took about 14 mins. or so to bake)
Remove from pan, and cool on wire rack.
*To toast walnuts: Spread walnuts evenly in small baking dish or pie pan, and bake at 350F until fragrant and lightly browned, stirring twice, 6-8 minutes.

Monday, March 27, 2006

You win some...you lose some...

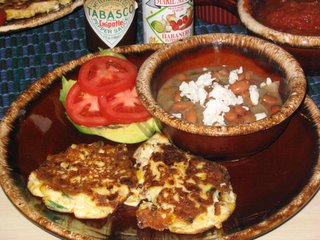
Friday night I wanted to make a Greek themed dinner. On the menu: Greek Greens and Sweet Onion Pie and Fassolakia Yiahni (Ragout of Fresh Green Beans). Let's start with the winner.

I found some fabulous looking pole beans at the local grocery, so I used them, red potatoes, and canned tomatoes. I cooked according to the recipe (see below), except I was fresh out of dried chilis, so I subbed a tsp. (or two) of chili garlic sauce.

This recipe is so simple and easy to make, yet the final product is definitely one of those that is greater than the sum of its parts. I love, love , love this recipe. Thanks to former Lexington Supper Clubber Patt B. for sharing her scaled down (in calories and fat, definitely not in taste) version of this dish.

Fassolakia Yiahni (Ragout of Fresh Green Beans)

1 Tbsp. extra virgin olive oil (Patt lightened this from 1/4 cup! EEK!)
2 medium onions, halved and very thinly sliced
1 garlic clove, chopped
3 pounds fresh green beans, topped and tailed
4 medium potatoes, peeled and cut into chunks
4 – 5 tomatoes, peeled and coarsely chopped, or 1 28-oz can whole tomatoes, drained and coarsely chopped
1 small dried hot red chili
salt and freshly ground black pepper to taste

In a pan large enough to hold all the vegetables, warm the olive oil over medium-low heat. Add the onions and garlic and cook, stirring occasionally, until the onions are meltingly soft – about 10-15 minutes. Add the beans and potatoes and stir with a wooden spoon for a few minutes, intil the vegetables are coated with oil and beginning to soften.

Add the tomatoes and chili and a few tablespoons of water. Simmer for about I hour, adding a little water every so often if necessary. The vegetables are done when they are very softg and the tomatoes are reduced to a thick sauce that naps the vegetables. Season to taste with salt and pepper. Though it can be served hot, traditionally, this is served at room temperature.

You might like to top it off with a squirt of lemon, but I did not find this necessary.
Apologies for not having pictures today. My camera was not around for this dinner!

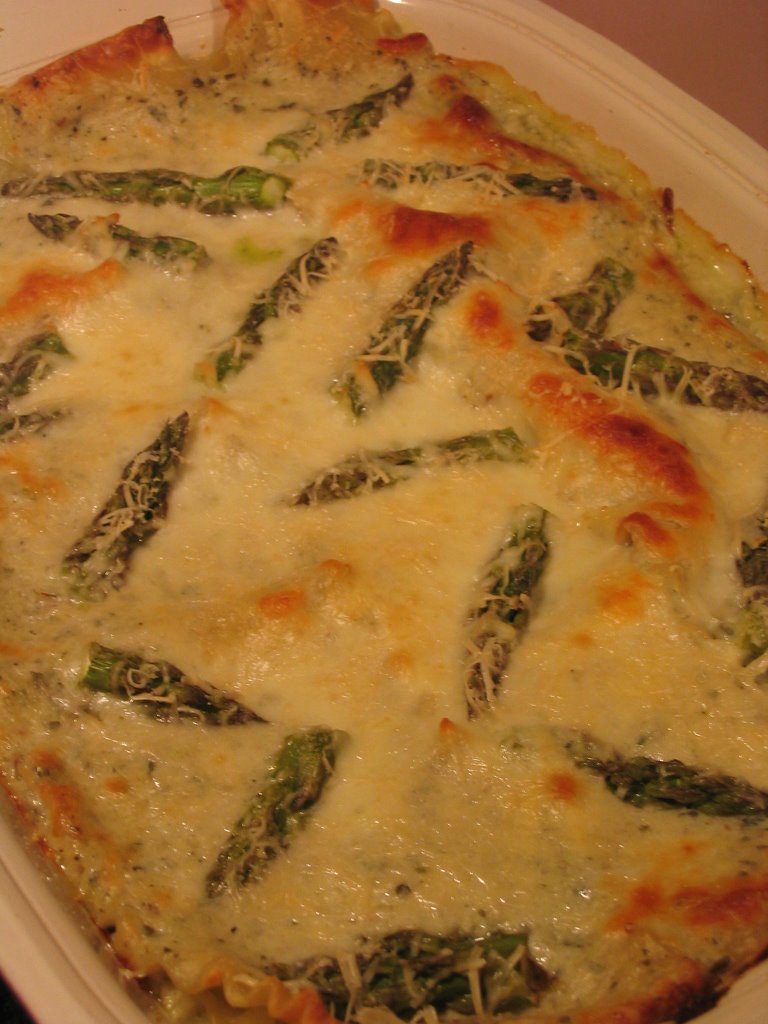
And now on to the LOSER! First, let me confess that it is my fault that it was a loser -- pure operator error here. The Greek Greens and Sweet Onion Pie is absolutely one of my favorite dishes. This is a Cooking Light recipe, and it satisfies the craving for spanikopita. Here is the recipe, as written. I will fill you in, dear reader, with the details on the other side.


Greek Greens and Sweet Onion Pie

2 quarts water
12 cups torn Swiss chard (about 3/4 pound)
8 cups torn spinach (about 1/2 pound)
Cooking spray
2 cups chopped Vidalia or other sweet onion
2 garlic cloves, minced
1/4 cup chopped fresh dill
1/4 cup chopped fresh flat-leaf parsley
3/4 cup (3 ounces) crumbled feta cheese
2 large eggs, lightly beaten
2 large egg whites, lightly beaten
1/2 teaspoon freshly ground black pepper
1/4 teaspoon salt
10 sheets frozen phyllo dough, thawed

Bring 2 quarts water to a boil in a large Dutch oven. Add the chard and spinach; cook 2 minutes or until tender. Drain well. Place chard mixture on several layers of paper towels; squeeze until barely moist.
Preheat oven to 375°.

Heat a large nonstick skillet coated with cooking spray over medium-high heat. Add onion; sauté 5 minutes or until tender. Add garlic; sauté 1 minute. Add chard mixture, dill, and parsley, stirring well to combine. Cook 1 minute or until thoroughly heated. Remove from heat. Combine chard mixture, cheese, eggs, and egg whites, tossing well to combine. Stir in pepper and salt.

Place 1 phyllo sheet on a large cutting board or work surface (cover remaining dough to prevent drying); lightly coat phyllo sheet with cooking spray. Place phyllo sheet in a 9-inch pie plate coated with cooking spray, allowing edges to overlap plate rim. Repeat the procedure with 6 additional phyllo sheets, placing sheets in a crisscross design. Spoon the spinach mixture over phyllo. Lightly coat each of remaining 3 phyllo sheets with cooking spray, and place sheets over spinach mixture in a crisscross design. Roll excess phyllo into the dish to create a decorative edge; press lightly to hold. Cut 4 (2-inch) slits in top of pie; cover with foil. Bake at 375° for 10 minutes. Uncover and bake an additional 30 minutes or until crust is crisp and golden. Cut pie into 8 wedges. Yield: 4 servings (serving size: 2 wedges)

CALORIES 312(30% from fat); FAT 10.5g (sat 4.8g,mono 3.5g,poly 1.1g); PROTEIN 16.1g; CHOLESTEROL 125mg; CALCIUM 264mg; SODIUM 955mg; FIBER 5.9g; IRON 6.1mg; CARBOHYDRATE 40.3g Cooking Light, APRIL 2004

Okay, simple enough. First red flag -- my local grocery store had "re-set" their frozen food section the day before and gotten rid of the phyllo dough (not that the clerk even knew what "feee-low" was!). So, I trekked on over to a competitor (a store I never go into b/c it is kinda scary), and found some there, albeit at a much higher price. Second red flag -- no Swiss chard to be found in the produce section, and the spinach was pricey and sad looking. So, I opted for 2 big bunches of kale (cheap and pretty).

(*As a side note, I am not a huge greens person, shh! don't rat me out!. I am a PTC taster, and so most greens are bitter to me. But I was pretty sure I had eaten kale before and liked it.....)

Okay, got home, got the green beans cooking, and started cleaning the greens, ripping them up in preparation for steaming (screw blanching them!). Interruptions abounded. My hubby came home, the animals needed to be fed, solicitors were at the door...then some friends showed up to drop off their car for hubby to do a brake job on. By the time they left, I was tired, but determined to wrangle the phyllo and kale into a tasty dinner!

The kale had been steaming the entire time we had company. However, it didn't occur to me that it had been steaming for at least 30 minutes, and yet it was still green and crunchy. Cue the bad omen/foreshadow music.
So, I mixed the greens with the onions, greek seasoning (I don't have the necessary idividual herbs, so I use this great mix from a local herb vendor in Lexington, KY), feta, eggs, etc.

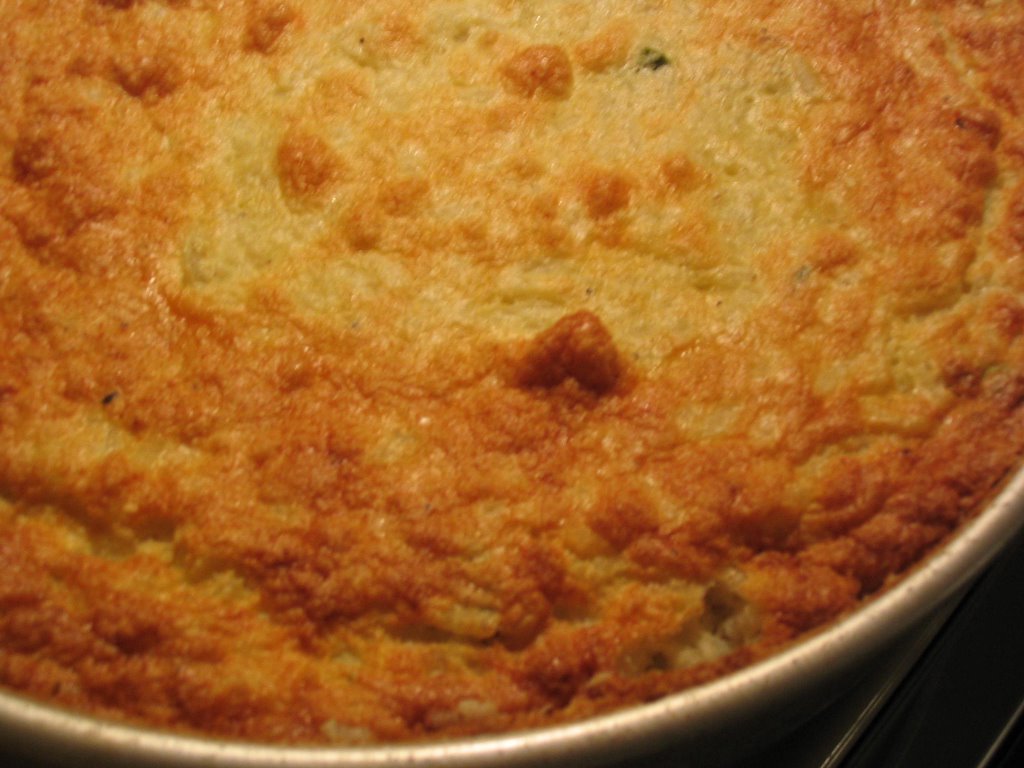
In the pie dish I stick the phyllo, followed by the kale mixture. WOW! It was really mounding up in the pie plate. I didn't remember it being so much before....cue the bad omen music again....Topped it with the remaining phyllo sheets, cut the slits, and popped it into a 375 degree oven.

10 minutes later, and I removed the foil, and put it back in for another 30 minutes.

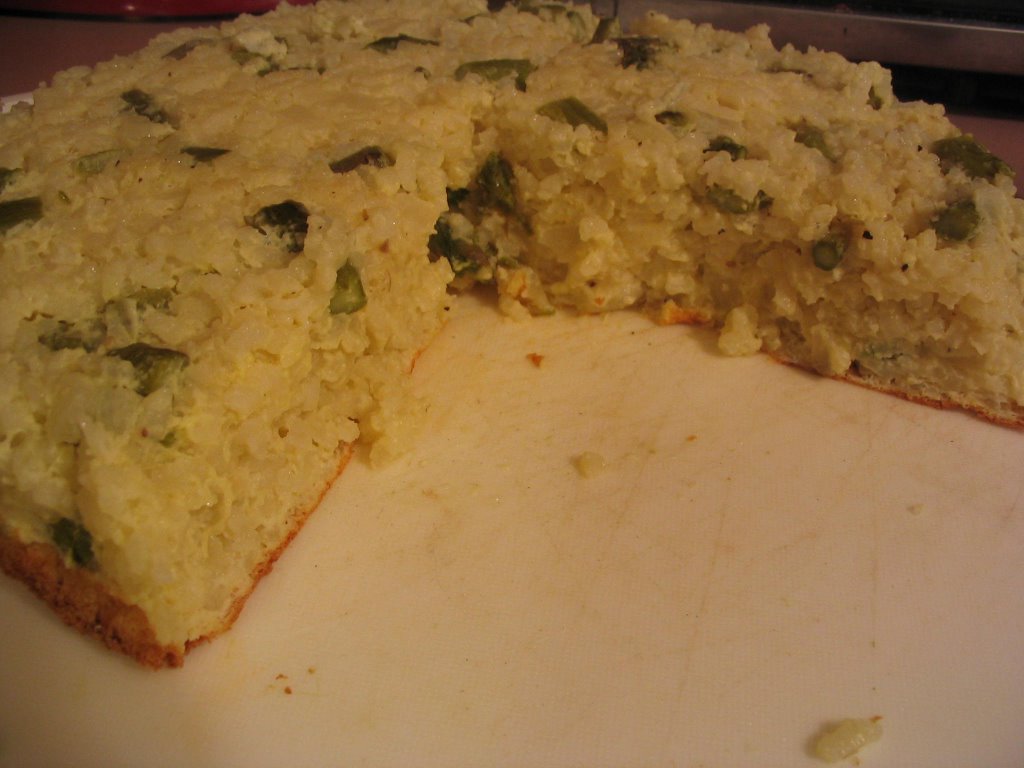
Timer went off, I let it cool slightly, and cut into to it. It looked good, although there was some water on the bottom of the pie plate. Mmmm...could it just be from the kale?

Sat down on the couch with my plate, got all comfy, and took a bite of lukewarm (at best) greek pie. What? LUKEWARM?????? NO WAY! I went back to the kitchen, and decided that the kale was so dense that the pie had not cooked through all the way, and the liquid in the bottom of the pie plate was uncooked egg! Back in the oven w/ the remaining pie. My piece and hubby's piece went into the toaster oven to speed up the single serving cooking process.

20 minutes later and hubby and I decided to share the big cooked piece. I took two bites and decided it was too bitter and not what I really wanted...so I ate a bunch of the green beans and called it a night. The leftove pie is still sitting in the fridge, awaiting its final resting place (likely the trash at this point).

The worst part is -- I love this recipe! I have made it before with much success. My failure was due to trying to use kale in the place of the greens called for. Well, never again!
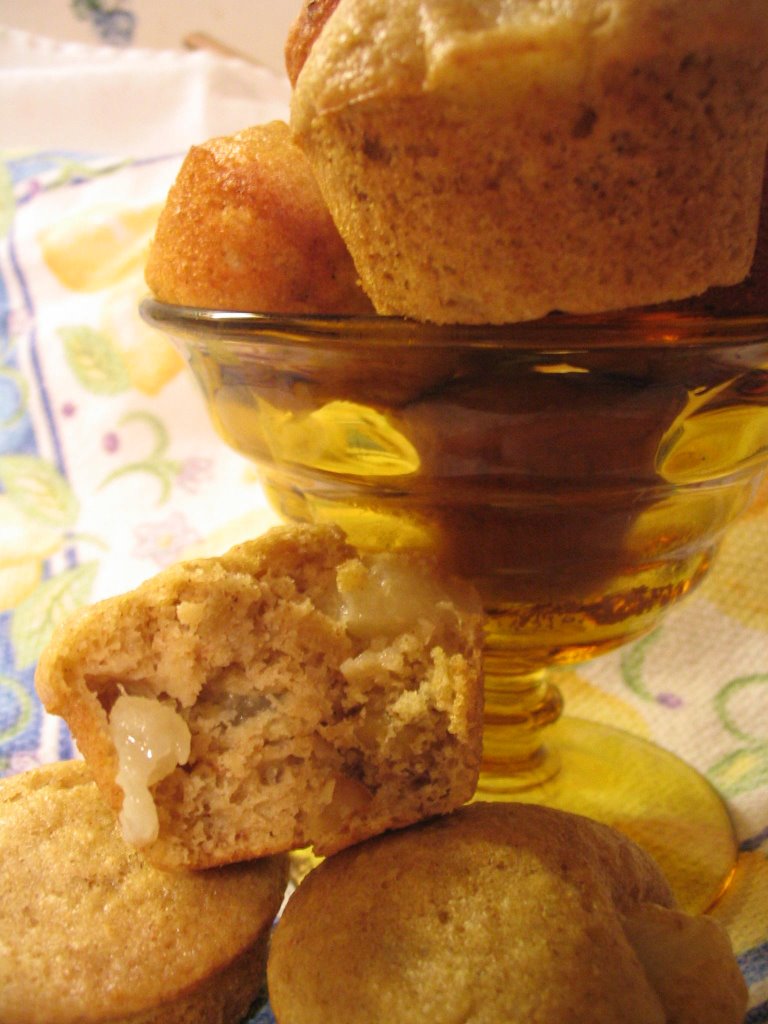
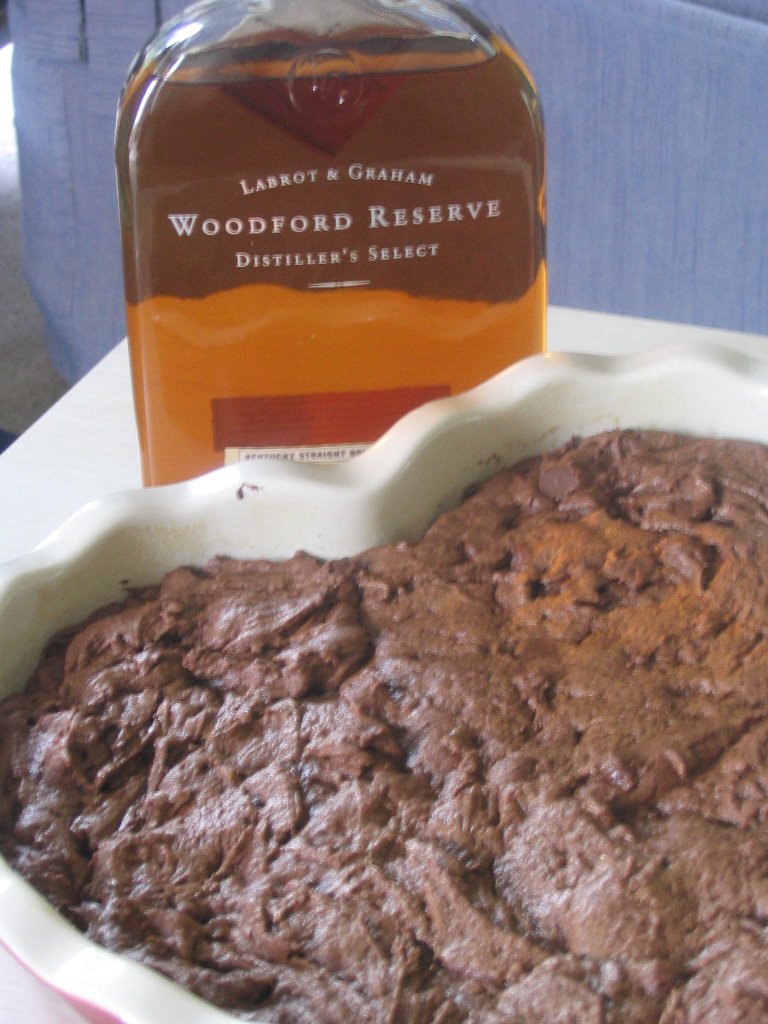
Monday, March 06, 2006

Now we're cooking!

After several frustrating trips to the local grocer, I have decided we will no longer be buying pre-made bread. Between the trans fats, high fructose corn syrup, and whatever else they put in bread (all of those loaves that say "Healthy", "Health Nut," "Light"...what a load of crap!), I refuse to buy any of it!
I love the Sandwich Bread Recipe from Deborah Madison's Vegetarian Cooking for Everyone, as it is tasty, easy, and makes two loaves.

However, all baking at my house had been halted b/c this weekend we bought a new (to us) stove to replace our old fire hazard. I was plenty excited; I was set to make sandwich bread. My enthusiasim waned upon John pulling out the old stove to find that it was hard-wired into the electrical lines -- no plug to unplug! EEK!
One trip to Home Depot later, and we were both too tired to deal with it on Saturday night. We did mangae to carry out the old stove to sit in our driveway until the "convenience center" opened up the next day.

Since we had no stove to cook on, we grilled out. Chicken for John, Amy's Texas Burger for me (pictured below). I also cut up some zucchini and squash, tossed them with olive oil and fajita seasonings, and put them on the grill in a foil packet. The dinner was yummy and filling! We ate our bbq by the fireplace while watching The Money Pit. A good flick that was to foreshadow our Sunday...


Sunday morning came, John brought me coffee and an english muffin in bed. I was siked because I was able to relax and we were going to have our new stove hooked up today! John re-wired the outlet so we could put the stove in (ahhh...he is so handy!). I scrubbed it clean in the garage, and was ready to instally it by 11:00 AM! Ahh, but that was not to be! The old stove was wider on top than the new one. However, the old stove was a drop-in, and looks are deceiving. The stovetop was wider, but the oven portion was skinnier.

We tried to push the new stove into the too small space, but we were not having any more luck than the wicked haggy stepsisters in Cinderella trying to fit into the glass slipper. John did some banging around with the hammer, to no avail. The cabinet on the right side was up against a chair rail, base board, and 3/4 round.

This meant we had to pull out the fridge. (And hey, while we are at it, unplug it and take off the back cover so I can vacuum out all the dust bunnies on the coils...) Once out, John was able to use his handy-dandy cordless Ryobi sawzall (or some such thing), and take pieces out of the baseboard and chair rail w/o removing them completely!

Here is John in action


So, after removing the countertop and cabinet, our new stove was finally in place.

I could finally get around to making that bread! Oh, before I forget, I decided to run the self-cleaning option while the bread was rising. FIVE (5) + hours later, John had to go turn off the stove at the breaker box, so I could get the door to unlock. By then it wasn't even hot inside, but my bread dough had already gone through its third rising! I don't think I will be using that feature again.

And, so to put the happy ending on a long story, here is one of the loaves of bread that I made. I had several pieces for breakfast, with come unsalted butter. Yummy!

Friday, March 03, 2006

Nuevo Mexico!

I can eat Mexican and Mexican-inspired food everyday. I never (or very rarely) get tired of it. I love the endless variations of beans, rice, corn (in its many forms), tomatoes, onions, garlic, cheese...oh my!
The other night I decided to make some Mexican-inspired (I like to think of them as Nuevo Mexcian) dishes.
The first was Drunken Pinto Beans with Charred Onions and Chilis from Jack Bishop's A Year in a Vegetarian Kitchen (from the winter section). Here is a picture of them in a bowl (they are a little bit soupy) with some queso fresco on top.

I also made Spicy Corn Cakes with Smoked Cheese and Chilis (in the foreground).

The corn cakes were interesting. I compared them to Mexican Egg Foo Yung (sp?). I used tofu in place of the ricotta (maybe a little too much tofu), and didn't have any cayenne pepper so I subbed Fajita seasoning (salt-free). Next time I make these I will use corn meal instead of flour, and really spice them up. Also, it made a ton! They were good (maybe even better) leftover the next day at lunch.

Spicy Corn Cakes with Smoked Cheese and Chilies
from Fields of Greens

1/2 tablespoon light vegetable oil

1/2 medium red onion, diced, about 1 cup

salt

3 ears of corn, shaved, about 3 cups kernels (I used frozen)

1/4 teaspoon cayenne pepper

2 or 3 jalapeno chilies, seeded and thinly sliced

1 tablespoon fresh lemon juice

2 eggs, separated

1/2 pound ricotta cheese, about 1 cup

1/2 cup milk

1/2 cup unbleached whie flour

1 teaspoon baking powder

2 ounces smoked cheese, grated, about 3/4 cup (I used smoked gouda)

light vegetable oil for the pan

Heat the oil in a large skillet; add the onion and 1/2 teaspoon salt

Saute over medium heat until soft, about 5 minutes. Add the corn and the cayenne; saute for about 5 minutes, until the corn is tender. Add the chilies and lemon juice to the warm corn, transfer to a bowl, and allow the mixture to cool.

Beat the egg whites to stiff peaks.

In a medium-size bowl, combine the egg yolks, ricotta, and milk. Stir in the flour, 1/2 teaspoon salt, and the baking powder, then add the smoked cheese. Stir the corn into this mixture, then fold in the egg whites.

Spoon the batter into a lightly oiled skillet over medium-high heat, making 3-inch cakes. Cook for about 3 minutes on each side, until the cakes are lightly browned.Makes 24 three-inch cakes; serves 4 to 6

Friday, February 24, 2006

So...


Whatcha’ Cooking This Last Weekend of February 2006?

Thursday, February 23, 2006

Broccoli Risotto Torte


Broccoli Risotto Torte (Serves 6)
8 oz. broccoli, cut into very small florets
(I used 1 ½ cups chopped roasted asparagus)
1 onion, chopped
2 garlic cloves, crushed
1 large yellow pepper, chopped (didn’t have, omitted)
2 T. olive oil (1 T)
4 T. butter(1 ½ to 2 T)
1-1/4 cup Arborio rice
1/2 cup dry white wine
4-1/2 cups stock/broth (4 cups veggie broth)
salt and pepper to taste
4 oz. fresh Parmesan cheese, coarsely grated (1/2 to 2/3 cup mozzarella and 2 oz. crumbled goat cheese)
4 eggs, separated
Cooking spray

1. Blanch broccoli for 3 minutes then drain and reserve.
2. In a large saucepan, gently saute onion, garlic and yellow pepper in the oil and butter for 5 minutes until they are soft.
3. Stir in the rice, cook for a minute then pour in the wine. Cook, stirring the mixture until the liquid is absorbed.
4. Pour in the stock/broth, season well, bring to a boil then lower to a simmer. Cook for 20 minutes, stirring occasionally.
5. Meanwhile, spray a 10" round deep cake pan and line the base with a disc of waxed paper. Preheat the oven to 350 degrees.
6. Stir the cheese into the rice, allow the mixture to cool for 5 minutes, then beat in the egg yolks. Stir in broccoli.
7. Whisk the egg whites until they form soft peaks and carefully fold into the rice. Turn into prepared pan and bake for about 1 hour until risen, golden brown and slightly wobbly in the center.
8. Allow the torte to cool in the pan, then chill if serving cold. Run a knife around the edge of the pan and shake out onto a serving plate. (I served this hot, as I don't really like cold eggs. The leftovers are good, and this would make an excellent brunch dish with a salad [or fruit salad] and crusty bread.)

Note: this cut a lot easier once it had cooled for more than 2 minutes (I was hungry and couldn't wait!)
Fresh from the oven

Friday, February 17, 2006

Thai Tofu Curry


I made this beautiful Thai Tofu Curry dish one recent cold winter night. The wiggly golden tofu sticks were paired with stir-fried broccoli and mushrooms, simmered in a red curry paste, garlic, and coconut milk sauce. All of this was laid atop a bed of delicate, but hearty, steamed brown rice, and topped off with shredded cabbage and cashew pieces with a twist of lime. My dinner was loosely based on the following recipe:

Thai Tofu with Red Curry Sauce over Coconut-Scallion Rice

10 dried kaffir lime leaves -- or 1 1/2 tsp lime zest
1 1/4 cups coconut milk
2 3/4 cups water
1 teaspoon salt
1 1/2 cups jasmine rice -- or basmati or regular long-grain white rice
2/3 cup cilantro
2 large garlic cloves -- halved
1/4 cup dry-roasted peanuts
1 tablespoon fish sauce -- or 1/2 tsp salt
1/4 cup canola oil -- or corn oil
3 tablespoons hot chile sauce -- or 2 tbsp chile paste
16 ounces firm tofu -- patted dry and in 1/2" cubes
1/2 bunch broccoli -- in small pieces, about 4 cups
1 cup minced scallion
2 tablespoons minced cilantro

Soak lime leaves in 1 quart very hot water 30 minutes.

While leaves soak, bring the coconut milk, 2 1/4 cups water, and salt to a boil. Add rice. Cover and simmer 25 minutes.

Drain the lime leaves and chop into pea-sized pieces. In a food processor or blender, process lime leaves (or lime zest), cilantro, garlic, and peanuts. With the machine running, add fish sauce and 3 tbs oil, then the chile sauce. Set aside.

In a wok or nonstick skillet, heat 1 tbsp oil. Add tofu, cook until the pieces form a golden crust on the bottom. Turn, and let tofu crust on the other side. Transfer to a plate.

In the same wok or skillet, add the broccoli and 1/2 cup water. Cover and steam 2 minutes. Add lime-peanut paste, and cook, stirring, 1 minute more. Add tofu and toss to coat. Stir scallions into the rice. Serve with tofu, garnished with cilantro.

Source:
"Vegetarian Planet"

Friday, January 27, 2006


rows and rows of the "nectar of the gods" Posted by Picasa

our fave honey stand Posted by Picasa

Wednesday, January 25, 2006

the fruits of our labor


a very bountiful August day in the garden (2004)